[Docker] Homebrew로 Mac에 도커 설치

맥OS에서 Homebrew를 통해 도커를 설치할 수 있다. brewbrew cask를 통해 설치할 수 있는데, 두 방법에는 차이가 있어 기록한다.

Homebrew 설치 두가지 방법

Homebrew를 통해 도커를 설치하는 방법은 두 가지가 있다. brewbrew cask를 통해 설치할 수 있다.

brew caskDocker Desktop on Mac 도커를 설치해주며, docker-compose, docker-machine을 같이 설치해준다.
그리고 맥OS에서 띄우는 것이기 때문에 서버를 띄웠을 때, 가상 머신에서 포트 포워딩할 필요가 없다.

brew를 통해 설치할 경우 virtualbox, vargrant 등 가상머신 위에 도커를 띄우는 작업을 해야한다.
그리고 brew cask와 다르게 compose, machine 등 필요한 것들을 추가 설치할 필요가 있다.
또 서버를 실행했을 때 호스트OS에서 서버에 접근하려면 포트포워딩 설정을 해줘야한다.

개인적으로 맥에서 사용할때는 Docker Desktop on Mac을 더 선호한다.


brew cask install

1
$ brew cask install docker

설치하면 Applications 디렉토리에 docker.app이 있는 걸 확인할 수 있다. 이를 실행해주면 시스템바에 귀여운 도커 아이콘이 생긴다. (괜히 귀엽다)
(한번 실행해줘야 /usr/local/bin에 도커 링크가 생기고, 터미널에서 작업할 수 있다)
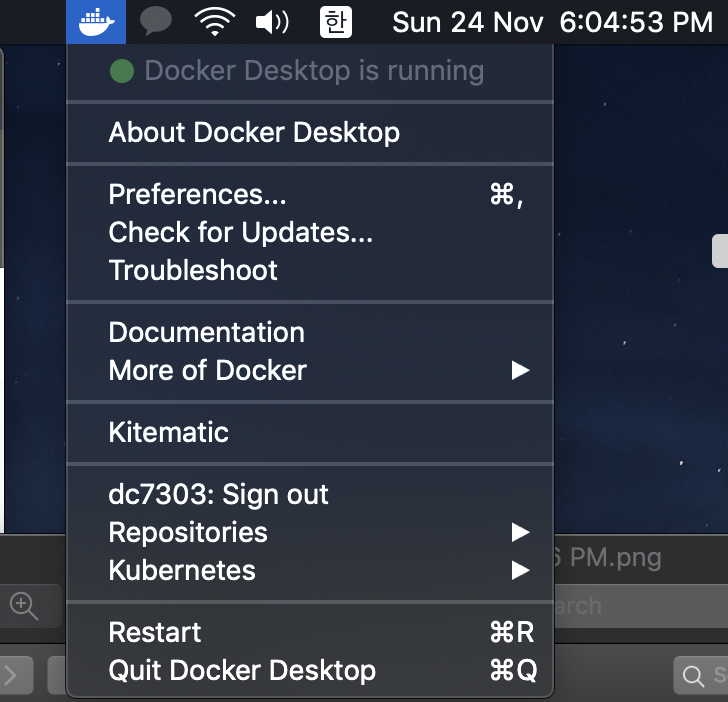
docker-run<도커가 실행된 모습>

그리고 터미널에서 실행해보자.

1
2
3
$ docker --version

Docker version 19.03.5, ........

brew install

도커, 가상머신 설치

1
2
$ brew install docker docker-machine
$ brew cask install virtualbox

여기서 virtualbox를 설치할 때 아래 이미지와 같은 에러로 실패하는 걸 확인할 수 있다.

vm-setup-error<버츄얼박스 설치 에러>

이때 System Preferences -> Security & Privacy 메뉴에 접근하면 아래 이미지와 같은 메세지가 나올 것이다.
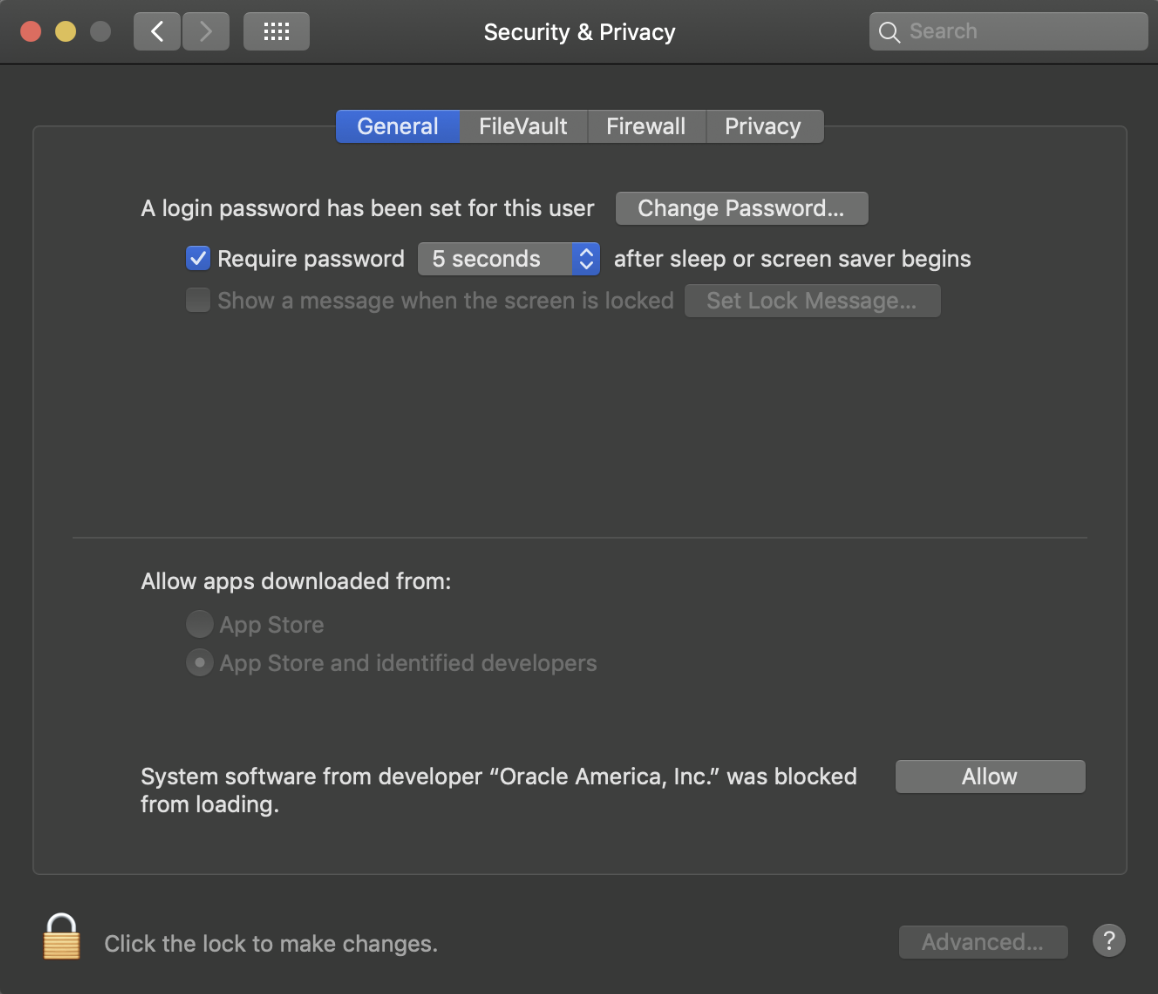
vm-setup-solution<Security & Privacy>

Allow 해주고 다시 brew cask install virtualbox를 실행해주면 설치가 완료된다.

가상 머신 생성 및 설정

docker-machine을 통해 가상 머신을 생성한다.

1
2
3
4
5
$ docker-machine create --driver virtualbox default
$ docker-machine ls

NAME      ACTIVE   DRIVER       STATE     URL                         SWARM   DOCKER     ERRORS
default   *        virtualbox   Running   tcp://192.168.xxx.xxx:xxxx          v19.03.5

가상 머신을 생성했으면, 도커 명령을 사용할 시스템을 설정한다.

1
$ docker-machine env default

이 작업은 쉘 설정 파일에서 자동화할 수 있다.

1
eval $(docker-machine env default)

정상적으로 동작하는지 확인해보자.

1
2
3
4
5
6
7
8
9
10
11
12
13
14
15
16
17
18
19
20
21
22
23
24
25
26
27
28
$ docker run hello-world
Unable to find image 'hello-world:latest' locally
latest: Pulling from library/hello-world


...


Hello from Docker!
This message shows that your installation appears to be working correctly.

To generate this message, Docker took the following steps:
 1. The Docker client contacted the Docker daemon.
 2. The Docker daemon pulled the "hello-world" image from the Docker Hub.
    (amd64)
 3. The Docker daemon created a new container from that image which runs the
    executable that produces the output you are currently reading.
 4. The Docker daemon streamed that output to the Docker client, which sent it
    to your terminal.

To try something more ambitious, you can run an Ubuntu container with:
 $ docker run -it ubuntu bash

Share images, automate workflows, and more with a free Docker ID:
 https://hub.docker.com/

For more examples and ideas, visit:
 https://docs.docker.com/get-started/