[Python] 크롤링으로 업무 자동화 - (4)파일 비교

다운로드한 엑셀 파일을 비교해보자.

들어가기에 앞서

압축 풀기

먼저 이전 포스팅에서 설치된 압축 파일의 압축을 풀어야 한다. 압축 풀기는 파이썬 내장 모듈인 zipfile모듈을 사용한다.

1
2
3
4
5
6
7
8
9
10
11
12
13
14
15
# main.py

...

import zipfile

...

repo_name = 'pycrawler-exam-dummy-data-master'
zip_file_path = f'{DOWNLOAD_DIR}/{repo_name}.zip'
if os.path.isfile(zip_file_path):
    z = zipfile.ZipFile(zip_file_path)
    z.extractall(DOWNLOAD_DIR)
    z.close()
    os.remove(zip_file_path)

os.path.isfile() 함수를 통해 파일 존재 여부를 확인하고 extractall() 함수로 압축을 푼다. 그리고 zip 파일은 더는 필요 없으니 os.remove() 함수를 사용하여 제거한다.
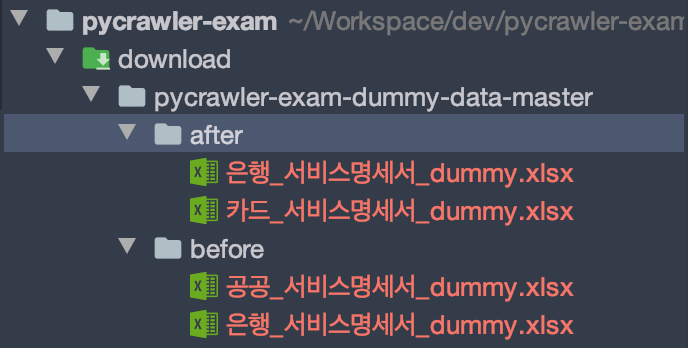
unzipResult<압축 해제 결과>

그러면 필자가 만들어 놓은 더미 데이터들이 셋팅된다. 실제 업무에서 사용될 xlsx 파일의 형태와 디렉토리 구조는 다양할 것이다. 예제는 쉽게 구성했다.

before 디렉토리는 수정전, after 디렉토리는 수정 후라는 가정으로 작성했다. 그리고 파일이 추가/삭제 여부와 시트 업데이트 여부를 확인할 것이다.

비교 코드를 작성하기 전에 코드 하나를 추가한다. 현재 상태에서는 예제를 실행할 때마다 압축 해제된 디렉토리를 지워야 하는 일이 발생한다. 압축해제 전 디렉토리가 존재한다면 먼저 삭제하는 코드를 추가해서 문제를 해결해 놓고 시작한다.

1
2
3
4
5
6
7
8
9
10
11
12
13
14
15
16
17
18
19
20
21
22
23
# main.py

...

import shutil

...

# zip파일 경로와 압축해제 후 디렉토리 경로 셋팅
repo_name = 'pycrawler-exam-dummy-data-master'
zip_file_path = f'{DOWNLOAD_DIR}/{repo_name}.zip'
xlsx_dir_path = f'{DOWNLOAD_DIR}/{repo_name}'

# 이전에 비교한 디렉토리가 있다면 삭제
if os.path.isdir(xlsx_dir_path):
    shutil.rmtree(xlsx_dir_path)

# ZIP 파일 존재여부 확인 후 압축 풀기
if os.path.isfile(zip_file_path):
    z = zipfile.ZipFile(zip_file_path)
    z.extractall(DOWNLOAD_DIR)
    z.close()
    os.remove(zip_file_path)

파이썬 내장 모듈인 shutilrmtree() 함수를 사용하여 삭제할 디렉토리와 그 하위 항목들 전체를 삭제해주면 된다.

이제 매번 실행할 때마다 디렉토리를 삭제하는 귀찮은 작업을 할 필요가 없어졌다.

파일 찾기

파일을 읽기 위해선 먼저 파일 경로를 알아야 한다. 예제의 파일의 수는 매우 적어 하드코딩으로 경로를 적어도 되지만, 만약 100개의 파일을 비교한다고 생각하면 쉽지 않을 것이다. 또한 파일이 추가, 삭제되는 구조라고 한다면 유지보수 또한 어려울 것이다.

이 문제를 파이썬 내장 모듈인 glob으로 해결할 수 있다.

1
2
3
4
5
6
7
8
9
10
11
12
13
14
15
16
17
18
# main.py

...

import glob

...

# 압축 해제한 파일 디렉토리 경로 선언
before_dir_path = f'{xlsx_dir_path}/before'
after_dir_path = f'{xlsx_dir_path}/after'

# 파일 경로 리스트 조회
before_xlsx_list = glob.glob(f'{before_dir_path}/*.xlsx')
after_xlsx_list = glob.glob(f'{after_dir_path}/*.xlsx')]

print(before_xlsx_list)
print(after_xlsx_list)

glob은 와일드카드 문자를 사용해서 일정한 패턴을 가진 파일 이름들을 지정하기 위한 패턴을 의미한다. 위 코드는 경로 내 모든 xlsx 파일(*.xlsx)을 찾아 리스트로 만들어 준다.

코드를 추가하고 실행해보면 파일 경로 리스트를 가져오는 걸 확인할 수 있다.

1
2
['/Users/choedongcheol/Workspace/dev/pycrawler-exam/download/pycrawler-exam-dummy-data-master/before/은행_서비스명세서_dummy.xlsx']
['/Users/choedongcheol/Workspace/dev/pycrawler-exam/download/pycrawler-exam-dummy-data-master/after/카드_서비스명세서_dummy.xlsx', '/Users/choedongcheol/Workspace/dev/pycrawler-exam/download/pycrawler-exam-dummy-data-master/after/은행_서비스명세서_dummy.xlsx']

파일 추가/삭제 파악

찾은 파일 경로들을 사용하여 파일이 추가 또는 삭제되었는지 확인해보자.

xlsxhandler.py를 생성하고 그 안에 업데이트 정보를 가져오는 함수를 작성한다.

1
2
3
4
5
6
7
8
9
10
11
12
13
14
15
16
17
18
19
20
21
22
23
24
25
26
# xlsxhandler.py

def get_dir_update_info(before_xlsx_path_list: list, after_xlsx_path_list: list) -> (list, list):
    """
    이전 파일 리스트와 현재 파일리스트를 비교하여
    삭제된 파일과 추가된 파일을 파악하여 반환

    :param before_xlsx_path_list: 이전 파일경로 리스트
    :param after_xlsx_path_list: 업데이트 후 파일경로 리스트
    :return: 삭제 파일 리스트와 생성된 파일 리스트
    """
    deleted_file_list = []
    new_file_list = []

    after_file_name_list = [after.split('/')[-1] for after in after_xlsx_path_list]
    before_file_name_list = [before.split('/')[-1] for before in before_xlsx_path_list]

    for before in before_file_name_list:
        if before not in after_file_name_list:
            deleted_file_list.append(before)

    for after in after_file_name_list:
        if after not in before_file_name_list:
            new_file_list.append(after)

    return deleted_file_list, new_file_list

코드를 보면 파일 경로를 /을 기준으로 split 한다. 그리고 리스트의 마지막 인덱스를 조회한다. 마지막 인덱스는 파일 이름이 들어가 있다. 파일 이름으로만 되어있는 리스트 after_file_name_listbefore_file_name_list를 만든다.

다음으로 before_file_name_list에 존재하고 after_file_name_list에 존재하지 않으면 삭제된 파일, 반대로 after_file_name_list에 존재하고 before_file_name_list에 없으면 새로 생성된 파일로 분류한다.

분류된 데이터는 deleted_file_listnew_file_list로 추가되어 반환된다.

근데 분류하는 과정에서 동일한 업무의 코드가 보인다. 단순화하기 위해 리팩토링한다.

1
2
3
4
5
6
7
8
9
10
11
12
13
14
15
16
17
18
19
20
21
22
23
24
25
26
27
28
29
30
31
32
33
34
# xlsxhandler.py

def _compare_file_list(compare_list: list, compare_target_list) -> list:
    """
    두 파일 리스트를 비교하여 다른 파일 정보가 있다면
    해당 파일 이름을 리스트에 담아 리턴한다.

    :param compare_list: 비교할 리스트
    :param compare_target_list: 비교 대상 리스트
    :return: 다른 항목 리스트
    """
    result_list = []
    for name in compare_list:
        if name not in compare_target_list:
            result_list.append(name)

    return result_list


def get_dir_update_info(before_xlsx_path_list: list, after_xlsx_path_list) -> (list, list):
    """
    이전 파일 리스트와 현재 파일리스트를 비교하여
    삭제된 파일과 추가된 파일을 파악하여 반환

    :param before_xlsx_path_list: 이전 파일경로 리스트
    :param after_xlsx_path_list: 업데이트 후 파일경로 리스트
    :return: 삭제 파일 리스트와 생성된 파일 리스트
    """
    after_file_name_list = [after.split('/')[-1] for after in after_xlsx_path_list]
    before_file_name_list = [before.split('/')[-1] for before in before_xlsx_path_list]
    deleted_file_list = _compare_file_list(before_file_name_list, after_file_name_list)
    new_file_list = _compare_file_list(after_file_name_list, before_file_name_list)

    return deleted_file_list, new_file_list

작성된 코드를 main.py에서 호출한다.

1
2
3
4
5
6
7
8
9
10
11
12
13
14
15
# main.py
...

from xlsxhandler import get_dir_update_info

...

# 파일 경로 리스트 조회
before_xlsx_list = glob.glob(f'{before_dir_path}/*.xlsx')
after_xlsx_list = glob.glob(f'{after_dir_path}/*.xlsx')

# 파일 삭제, 추가 정보 비교 분석
deleted_file_list, new_file_list = get_dir_update_info(before_xlsx_list, after_xlsx_list)
print(deleted_file_list)
print(new_file_list)

main.py를 실행하면 아래와 같이 삭제된 파일 리스트와 추가된 파일 리스트를 얻는다.

1
2
['공공_서비스명세서_dummy.xlsx']
['카드_서비스명세서_dummy.xlsx']

파일 내용 비교

판다스

xlsx을 데이터를 읽고 분석하는데 사용할 라이브러리는 pandas다. 판다스는 데이터 분석을 쉽게 할 수 있게 도와주는 라이브러리로 빅데이터, 머신러닝, 딥러닝 분야에 관심이 있다면 한 번쯤 들어봤을 것이다.

판다스를 사용한 이유는 csv, xlsx 데이터를 쉽게 불러오고 쉽게 다룰 수 있다는 점 때문이다. openpyxl과 같은 선택지도 있었지만, 판다스가 두 데이터 프레임을 비교하여 다른 부분을 추출할 때 더 짧은 코드를 작성할 수 있다고 생각했다.

판다스는 아래 명령어로 설치할 수 있다. 예제 프로젝트에 설치한다.

1
$ pip install pandas

파일 비교 함수 작성

파일 비교 함수도 xlsxhandler.py에 작성한다. 먼저 설치한 판다스를 import 한다. 그리고 파일 데이터를 가져오는 코드를 추가한다.

1
2
3
4
5
6
7
8
9
10
11
12
13
14
15
16
17
18
19
20
21
22
# xlsxhandler.py
import pandas as pd


def get_file_diff_info_list(after_xlsx_path_list: list, before_dir_path: str) -> list:
    diff_info_list = []
    for xlsx_path in after_xlsx_path_list:
        # 엑셀파일 읽기
        try:
            after_df = pd.read_excel(xlsx_path)
            file_name = xlsx_path.split('/')[-1]
            print('after - ', file_name, ':')
            print(after_df)

            # 이전 버전 조회
            before_df = pd.read_excel(f'{before_dir_path}/{file_name}')
            print('before - ', file_name, ':')
            print(before_df)
        except FileNotFoundError:
            continue

    return diff_info_list

read_excel()로 xlsx 파일을 읽으면 기본적으로 첫 번째 시트의 데이터를 가져온다. 이때 주의할 점은 파일을 읽을 때 추가/삭제 여부에 따라 before 디렉토리에 존재하지 않을 수 있다. 존재하지 않으면 FileNotFoundError가 발생할 수 있다. 여기서 존재하지 않는 건 에러가 아닌 디렉토리 업데이트 상태이다. 프로그램이 종료되는 걸 방지하기 위해 try/catch로 묶어주고 FileNotFoundError 발생 시 continue 처리해준다.

이렇게 함수를 추가하고 main.py에서 호출해본다.

1
2
3
4
5
6
7
8
9
# main.py
...

from xlsxhandler import get_dir_update_info, get_file_diff_info_list

...

# 파일 비교 분석 후 가져오기
file_diff_info_list = get_file_diff_info_list(after_xlsx_list, before_dir_path)

main.py를 실행하면 읽은 xlsx 파일의 첫 번째 시트 데이터들을 출력하는 걸 확인할 수 있다. 데이터 중 은행_서비스_dummy.xlsx의 데이터를 보면 아래와 같다.

1
2
3
4
5
6
7
8
9
10
11
12
13
14
15
16
17
18
19
...

after -  은행_서비스명세서_dummy.xlsx :
   Unnamed: 0  Unnamed: 1                 Unnamed: 2 Unnamed: 3
0         NaN        작성일자                         내용        작성자
1         NaN  2019-10-28                      최초 작성         세종
2         NaN  2019-10-29  00은행 계좌 조회 API 인증 파라미터 수정         태종
3         NaN  2019-11-01           00은행 계좌 이체 이슈 수정        이순신
4         NaN  2019-11-02         기관별 개발현황 탭 추가 (수정)        유관순
5         NaN  2019-11-03                  적금거래내역 추가        곽재우
before -  은행_서비스명세서_dummy.xlsx :
   Unnamed: 0  Unnamed: 1                 Unnamed: 2 Unnamed: 3
0         NaN        작성일자                         내용        작성자
1         NaN  2019-10-28                      최초 작성         세종
2         NaN  2019-10-29  00은행 계좌 조회 API 인증 파라미터 수정         태종
3         NaN  2019-11-01           00은행 계좌 이체 이슈 수정        이순신
4         NaN  2019-11-02              기관별 개발현황 탭 추가        유관순

...

로그를 보면 before와 after가 다른 걸 알 수 있다. after의 4, 5번 인덱스를 보면 알 수 있다. 판다스를 통해 서로 다른 데이터를 추출할 수 있다.

xlsx를 읽을 때 사용한 read_excel() 함수로 조회한 데이터는 DataFrame 타입의 데이터다. DataFrame은 판다스에서 사용하는 여러 개의 컬럼으로 구성된 2차원 형태의 자료구조다. 판다스는 DataFrame을 사용해서 데이터를 다루는데 유용한 함수들을 제공한다.

1
2
3
4
5
6
7
8
9
10
11
12
13
14
15
16
17
18
19
20
21
22
23
24
# xlsxhandler.py
...

def get_file_diff_info_list(after_xlsx_path_list: list, before_dir_path: str) -> list:
    diff_info_list = []
    for xlsx_path in after_xlsx_path_list:
        # 엑셀파일 읽기
        try:
            after_df = pd.read_excel(xlsx_path)
            file_name = xlsx_path.split('/')[-1]

            # 이전 버전 조회
            before_df = pd.read_excel(f'{before_dir_path}/{file_name}')
        except FileNotFoundError:
            continue

    # 시트 데이터가 같은지 비교 후 같지 않다면 상세 비교
    if not before_df.equals(after_df):
        # 두 데이터 다른 부분 추출
        df = pd.concat([before_df, after_df])
        duplicates_df = df.drop_duplicates(keep=False)
        print(duplicates_df)

    return diff_info_list

DataFrameequals() 함수를 통해 두 객체의 데이터를 비교할 수 있다. 비교 후 결과는 True | False이다.

만약 데이터가 다르다면 concat() 함수로 두 데이터 프레임을 합쳐주고, 합쳐진 데이터 프레임의 drop_duplicates() 함수로 중복된 데이터를 제거해준다. 이때 keep=False 옵션을 주어야 모든 중복 데이터가 제거된 결과를 반환한다. 설정하지 않을 경우 기본값 first가 셋팅되어 첫 번째 중복 데이터만 제거된다.

위 코드를 실행하면 서로 다른 데이터들을 확인할 수 있다.

1
2
3
4         NaN  2019-11-02       기관별 개발현황 탭 추가        유관순
4         NaN  2019-11-02  기관별 개발현황 탭 추가 (수정)        유관순
5         NaN  2019-11-03           적금거래내역 추가        곽재우

이렇게 확인된 데이터들을 after의 데이터인지, before의 데이터인지 판별하여 변경 정보 리스트를 만드는 코드를 추가한다.

1
2
3
4
5
6
7
8
9
10
11
12
13
14
15
16
17
18
19
20
21
22
23
24
25
26
27
28
29
30
31
32
33
34
35
36
37
38
39
40
41
42
43
44
# xlsxhandler.py

...

def get_file_diff_info_list(after_xlsx_path_list: list, before_dir_path: str) -> list:
    diff_info_list = []
    for xlsx_path in after_xlsx_path_list:
        # 엑셀파일 읽기
        try:
            after_df = pd.read_excel(xlsx_path)
            file_name = xlsx_path.split('/')[-1]

            # 이전 버전 조회
            before_df = pd.read_excel(f'{before_dir_path}/{file_name}')
        except FileNotFoundError:
            continue

    # 시트 데이터가 같은지 비교 후 같지 않다면 상세 비교
    if not before_df.equals(after_df):
        # 두 데이터 다른 부분 추출
        df = pd.concat([before_df, after_df])
        duplicates_df = df.drop_duplicates(keep=False)

        # ROW 데이터 스트링 리스트로 변환
        before_list = [str(r) for r in before_df.values.tolist()]
        after_list = [str(r) for r in after_df.values.tolist()]

        # 변경 전 데이터, 변경 후 데이터 분류
        changed_list = []
        duplicates_list = [str(r) for r in duplicates_df.values.tolist()]
        for row in duplicates_list:
            try:
                before_list.index(row)
                changed_list.append(f'~{row}~')
            except ValueError:
                pass

            try:
                after_list.index(row)
                changed_list.append(row)
            except ValueError:
                pass

    return diff_info_list

위 코드를 보면 DataFrame.values.tolist()DataFrame의 데이터를 리스트로 가져오는 것을 볼 수 있다.

DataFramevalues 프로퍼티는 ndarray 타입이다. ndarray는 넘파이의 핵심인 다차원 행렬 자료구조 클래스다. 구조는 파이썬 리스트와 유사하다. ndarraytolist() 함수로 파이썬 리스트값을 얻을 수 있다.

얻은 리스트 요소들을 스트링값으로 변환한다. 이유는 엑셀 데이터의 각 행과 열은 다차원 배열로 되어 있기 때문이다. 아래 before_df.values의 출력 예다.

1
2
3
4
5
[[nan '작성일자' '내용' '작성자']
 [nan '2019-10-28' '최초 작성' '세종']
 [nan '2019-10-29' '00은행 계좌 조회 API 인증 파라미터 수정' '태종']
 [nan '2019-11-01' '00은행 계좌 이체 이슈 수정' '이순신']
 [nan '2019-11-02' '기관별 개발현황 탭 추가' '유관순']]

row 데이터가 배열로 되어 있는걸 볼 수 있다. 이 데이터는 비교하고 메세지로 전송될 것이다. 그래서 스트링값으로 변환하여 리스트에 담은 것이다.

duplicates_df의 값도 동일하게 변환한다. 그리고 duplicates_df의 값들을 반복문 돌며 before에 있던 데이터인지, after에 있던 데이터인지 찾는다.

이때 리스트의 index() 함수로 찾는데, 데이터가 없을 때 ValueError가 발생한다. 데이터가 없는 건 에러가 아니기 때문에 프로세스 종료를 방지하기 위해 pass 처리 해준다. 에러가 발생하지 않는다면 changed_list에 추가한다.

추가할 때 before에 있던 데이터는 row 앞뒤로 ~을 더해준다. ~을 더해주는 것은 추후 슬랙에 내용을 전달할 때 마크다운 역할을 하기 때문이다. (이런 식으로 말이다)

이렇게 분류한 파일의 변경 리스트를 원하는 메세지 포맷으로 셋팅하여 슬랙으로 전송할 예정이다. 원할 때 이 리스트를 활용하여 메세지를 만들 수 있도록 models.py 파일을 생성하고 클래스를 추가한다.

1
2
3
4
5
6
7
8
9
10
11
12
13
14
15
16
17
18
19
20
21
22
23
24
# models.py

class FileDiffInfo(object):
    """
    파일 변경 정보 객체

    :param file_name: 파일 이름
    :param diff_row_list: 달라진 엑셀 ROW 리스트
    """
    def __init__(self, file_name: str, diff_row_list: list):
        self.file_name = file_name
        self.diff_row_list = diff_row_list

    def get_diff_row_format_str(self):
        """
        파일 다른 정보 스트링 값으로 파싱하여 리턴
        
        :return format_str: 정리된 변경 정보 스트링
        """
        format_str = ''
        for l in self.diff_row_list:
            format_str += '>' + l + '\n'

        return format_str

메세지 전송 전 get_diff_row_format_str() 함수로 변경된 정보를 메세지 포맷으로 변환하여 가져온다. 근데 이 함수에서 >를 스트링값 앞에 추가해주는 걸 볼 수 있다. 슬랙 마크다운 문법이기 때문에 추가했다. 자세한건 슬랙을 다루는 포스팅에서 다루겠다.

클래스를 선언했으니 생성하여 변경된 정보 리스트에 추가 후 리턴하면 최종적으로 xlsxhandler.py는 아래 코드가 된다.

1
2
3
4
5
6
7
8
9
10
11
12
13
14
15
16
17
18
19
20
21
22
23
24
25
26
27
28
29
30
31
32
33
34
35
36
37
38
39
40
41
42
43
44
45
46
47
48
49
50
51
52
53
54
55
56
57
58
59
60
61
62
63
64
65
66
67
68
69
70
71
72
73
74
75
76
77
78
79
80
81
82
83
84
85
86
87
88
89
90
91
# xlsxhandler.py

import pandas as pd
from models import FileDiffInfo


def _compare_file_list(compare_list: list, compare_target_list) -> list:
    """
    두 파일 리스트를 비교하여 다른 파일 정보가 있다면
    해당 파일 이름을 리스트에 담아 리턴한다.

    :param compare_list: 비교할 리스트
    :param compare_target_list: 비교 대상 리스트
    :return: 다른 항목 리스트
    """
    result_list = []
    for name in compare_list:
        if name not in compare_target_list:
            result_list.append(name)

    return result_list


def get_dir_update_info(before_xlsx_path_list: list, after_xlsx_path_list) -> (list, list):
    """
    이전 파일 리스트와 현재 파일리스트를 비교하여
    삭제된 파일과 추가된 파일을 파악하여 반환

    :param before_xlsx_path_list: 이전 파일경로 리스트
    :param after_xlsx_path_list: 업데이트 후 파일경로 리스트
    :return: 삭제 파일 리스트와 생성된 파일 리스트
    """
    after_file_name_list = [after.split('/')[-1] for after in after_xlsx_path_list]
    before_file_name_list = [before.split('/')[-1] for before in before_xlsx_path_list]
    deleted_file_list = _compare_file_list(before_file_name_list, after_file_name_list)
    new_file_list = _compare_file_list(after_file_name_list, before_file_name_list)

    return deleted_file_list, new_file_list


def get_file_diff_info_list(after_xlsx_path_list: list, before_dir_path: str) -> list:
    """
    파일 시트 다른 부분 정보 리스트 가져오기

    :param after_xlsx_path_list: 최신 서비스명세서 엑셀 파일경로 리스트
    :param before_dir_path: 읽을 파일 디렉토리 경로

    :return list: 파일 변경된 정보 객체 리스트
    """
    diff_info_list = []
    for xlsx_path in after_xlsx_path_list:
        # 엑셀파일 읽기
        try:
            after_df = pd.read_excel(xlsx_path)
            file_name = xlsx_path.split('/')[-1]

            # 이전 버전 조회
            before_df = pd.read_excel(f'{before_dir_path}/{file_name}')
        except FileNotFoundError:
            continue

        # 시트 데이터가 같은지 비교 후 같지 않다면 상세 비교
        if not before_df.equals(after_df):
            # 두 데이터 다른 부분 추출
            df = pd.concat([before_df, after_df])
            duplicates_df = df.drop_duplicates(keep=False)

            before_list = [str(r) for r in before_df.values.tolist()]
            after_list = [str(r) for r in after_df.values.tolist()]

            # 변경 전 데이터, 변경 후 데이터 분류
            changed_list = []
            duplicates_list = [str(r) for r in duplicates_df.values.tolist()]
            for row in duplicates_list:
                try:
                    before_list.index(row)
                    changed_list.append(f'~{row}~')
                except ValueError:
                    pass

                try:
                    after_list.index(row)
                    changed_list.append(row)
                except ValueError:
                    pass

            # 변경된 정보를 핸들링할 객체 생성
            info = FileDiffInfo(file_name, changed_list)
            diff_info_list.append(info)

    return diff_info_list

메인에 결과 확인 코드를 추가한다.

1
2
3
4
5
6
7
8
9
10
11
12
13
14
15
16
# main.py

...

# 파일 삭제, 추가 정보 비교 분석
deleted_file_list, new_file_list = get_dir_update_info(before_xlsx_list, after_xlsx_list)
print('삭제된 파일 : ', deleted_file_list)
print('추가된 파일 : ', new_file_list)

# 파일 비교 분석 후 가져오기
file_diff_info_list = get_file_diff_info_list(after_xlsx_list, before_dir_path)

print('파일 변경 정보 : ')
for f in file_diff_info_list:
    print(f'{f.file_name} : \n', f.get_diff_row_format_str())

실행하면 결과는 아래와 같다.

1
2
3
4
5
6
7
삭제된 파일 :  ['공공_서비스명세서_dummy.xlsx']
추가된 파일 :  ['카드_서비스명세서_dummy.xlsx']
파일 변경 정보 : 
은행_서비스명세서_dummy.xlsx : 
>~[nan, '2019-11-02', '기관별 개발현황 탭 추가', '유관순']~
>[nan, '2019-11-02', '기관별 개발현황 탭 추가 (수정)', '유관순']
>[nan, '2019-11-03', '적금거래내역 추가', '곽재우']

명세서 분석을 끝냈다. 다음 포스팅에서 슬랙을 활용하여 팀원들과 공유해보자.